Pendulum
Crafts | Soap Making | Candle Making | Dyeing | Alumnic Clay | Braiding
Torches | Citrus Delight Potpourri | Copper Wand | Divination Scarabs | Dream Catcher
Dream Pillow | Pendulum | Play Doh | Rose Petal Beads | Salt Dough | Scrying Mirror
The size and weight depend on whether you intend to use it inside or outside. For indoor use, it’s best to use a small and light pendulum. For outdoor use, I suggest that you make a sturdier model. The materials are cheap and construction is very simple.
One of the easiest materials to work with is acrylic (e.g. Plexiglas), though there is no reason why you do couldn’t use plastic or wood – in fact, any material, although some say you should avoid metal.

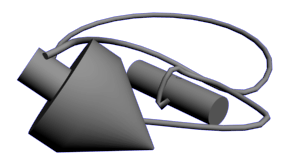
Cut a pendulum from a piece of acrylic rod. The smaller model should be about 2.5 cm long and about half of that in diameter. You’ll also need about 5 cm of a smaller rod (6-7 mm). Ask the store where you buy the acrylic on advice for how best to cut and shape it. Cut one end of the pendulum into a cone shape, as this makes it swing more easily.


Next step is to attach a string to the center of the top of the pendulum. The easiest way to do this is to drill as small a hole as possible close to one side of the thin rod. Use a sharp metal saw and cut the rod just below the hole. Attach the small rod in the center of the pendulum. Drill and saw slowly to avoid that cracking the material.
Thread a string through the hole and tie it firmly. A string of about 25 cm is enough for the smaller pendulum, while the large model should have a string of about a meter.

Drill and saw a new length of the thin rod to make a bobbin of about 5 cm in length. Thread the other end of the string through the bobbin and tie it. The bobbin is used to adjust the length of the pendulum to various substances, in the same way as a radio is adapted to the different stations.

Note: This is just one way to make a pendulum. Any object will work as long as it’s symmetrical, has a bit of weight to it, and the string is properly centred.

